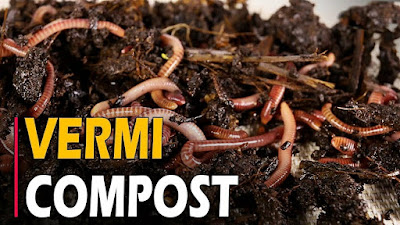
Vermicomposting is a type of composting in which certain species of earthworms are used to enhance the process of organic waste conversion and produce a better end-product. The advantages of vermicompost include enriching soil, increasing harvest yields and suppressing plant disease.
Vermicomposting is a simple biotechnological process of composting, in which a certain species of earthworms is used to enhance the processing of waste conversion and produce a better fertilizer product. Vermicompost is a product enriched with biological, physical and chemical properties that can enhance soil health and promote high growth and harvest of plants such as crops. The earthworms are encouraged to multiply by setting up their suitable environment, the moisture should be between 50 and 70%, and the soil pH should be 7. The application in crops is between 5-20 tons per hectare (this depends on crop’s needs and soil type).
 |
| 10 Steps to prepare Vermicompost |
There is approximately 1800 species of earthworm worldwide (Edwards & Lofty, 1992).
However, Eisenia fetida commonly known as the “compost worm”, “manure worm”, “redworm”, and “red wiggler”, is extremely tough, adaptable and indigenous to most parts of the world.
Benefits of vermicompost
This product contains more and readily available plant nutrients such as nitrogen, phosphorus, potassium and micronutrients. This product contains beneficial microorganisms that can solubilize phosphorus and other minerals for plant uptake. Vermicompost has high organic carbon that is highly required by plants as compared to other conventional composts. This compost has high water holding capacity, improves soil porosity, increases activity of beneficial microbes and is good when mixed with sandy soil.
VERMICOMPOST PREPARATION PROCESS
- Choose the suitable site for setting up vermicomposting, this should include protection, availability of dung or manure, water access and a conducive environment for earthworms
- Collect and gather stock piles of manure on top of the sol in heaps at a chosen spot.
- Ensure that the manure is dry, screen the feedstock to remove undesired materials such as weed seeds, stones, thorns, wire peace etc.
- Chop or grind the materials into small peace (at least less than 10 mm), this makes it easy to handle during preparations. These chopped materials are then stock piled to allow pre-decomposition before they are introduced to the earthworms.
- Preparations on windows on the soil surface measuring 1.2m-1.5m width x 0.3m high, and any length is convenient. Alternatively, construct bricks and mortar beds with drainage holes on the sides and apply water on the soil surface thoroughly, then apply the first layer off bedding materials (such as wood chips, dry leaves or grass etc.) and follow by attaching neem leaves (about 20 mm thick layer), and lastly attach manure up to a height of 0.3m for better air circulation inside the heap and prevent compaction.
- Sprinkle water after each layer is a must to moisten the materials, this activates initial decomposition by micro-organisms. If materials are too dry, first soak it in 100 or 200 liters of water and apply to the window or vermin beds. This process facilitates easy moistening of materials, it also prevents rotting of the piles, ingredients can be added at the middle of the heap in the process after the bedding.
- Earthworms are then introduced in the window or vermin bed at 5-10 cm below surface of the bed. Cover the vermin bed with gunny bags or other materials that can provide cooling and blocks sunlight (this can also be grass straws, broad leafed leaves, reeds), but please avoid using plastic.
- Continue watering (at least twice or thrice a week) and turning the vermin beds, if necessary, once or twice a month. This step is a very important management activity in the process of maturing of the vermicompost.
- The vermicompost is produced after 3-5 months. This depends on the area size and number of worms initially introduced in the vermin bed.
- Before harvesting, stop watering to allow drying of the top part of the vermicompost. After screening to remove undecomposed materials and worms, the final product is then dried for few days, weighed and bagged in 50 kg.
Conclusion
Vermicompost use worms to farm. Vermicompost is a new innovation that looks at creating compost for crop production and gardening. These same products could be used for producing forage.
REFERENCE
Edwards, C. A., & Bater, J. E. (1992). The use of earthworms in environmental management. Soil Biology and Biochemistry, 24(12), 1683-1689.

